Let’s start by watching this segment from Unwrapped on How M&M’s are made. I always like sharing this type of information with children as they often have no concept of how the items are created. This episode give a bit of the backstory as well as a tour of the facility where the candy is produced!
Now lets read another M&M book… yes, another fun math book using M&Ms! This one is called More M&M Math by Barbara Barbieri McGrath. In this book you will sort and then graph candy… so guess what we are going to do today!?! Sort and graph!
Instead, I sorted the collection of odd Lego pieces I have in my kitchen. Don’t you have an odd Lego collection somewhere? No? Well sort any odd collection you have. Maybe you can then convince your child to put them away when they are done sorting?
Help your child create a graph grid to fill in with the materials you are choosing to graph. I was lazy and didn’t get out a ruler, but doing it with straight lines helps a bit. Now sort! Talk about what you see. Which is the least? Which is the most? Are any the same? How many more gray than red? How many fewer gold than clear?
When we are nervous about life we are told to picture others in their underpants… maybe this helps children too if they think about monsters in underpants? Children love monsters… and they think underpants are too funny. So put monsters in their underpants and there is nothing that will bring more smiles, giggles and funny images!
Time to draw, paint… create a monster of your own!
My monster is wearing plaid underwear
Not sure how to get started or can’t think of a monster on your own? check out Art for Kit Hub’s paint a monster as inspiration… But, make sure to add underpants to your monster!
This is a great opportunity to encourage your child to write!! I guarantee your child has a story in his/her head about this underwear loving monster. You can provide words like monster, underpants, but encourage him/her to sound out the words the best they can. The purpose of children writing is not for them to spell every word correctly … it is for them to see him/herself as a writer. To put down their thoughts on paper. To see the connection between sounding out words to read and write. So encourage your child to write. Have them read what they wrote and praise the attempt, not criticize the imperfection.
Today we will continue our topic of Scarecrows! Here is another great story: Scarecrow by Cynthia Rylant.
After listening to to this or another scarecrow story, lets do a scarecrow project!
But first… let me talk a bit about arts and crafts. Often times, teachers and parents provide all the parts and pieces of a project and then have the students put the project together step by step… this is not art, this is a lesson on following directions. While this is important too, it is not allowing your child to be creative. Some projects you can provide a piece to, but provide it in the form of a tracer and then still let your child choose how to manipulate that tracer.
When we give children materials and ideas, but then let them take it in their own direction… this is art. This is allowing your child’s creative nature to take over the project.
Ok… onto our scarecrow project. Here are a few ideas:
Paper Bag Scarecrow Head:
provide paper bag– other items you can use: construction paper, googly eyes, yarn, fabric, drawing tools (crayons, markers, colored pencils…) etc.
Help your child fill the bag with newspaper or plastic bags.
Then tie off the top of the bag.
Let your child have fun!
Paper Bag Scarecrow Puppet:
provide paper bag– other items you can use: construction paper, googly eyes, yarn, fabric, drawing tools etc.
show your child how the bag will be the mouth of the scarecrow
Let your child have fun!
Paper Plate Scarecrow Head:
provide paper plate– other items you can use: construction paper, googly eyes, yarn, fabric, drawing tools etc.
let your child have fun!
Construction Paper Scarecrow:
provide construction paper– other items you can use: googly eyes, yarn, fabric, drawing tools etc.
let your child have fun
Just Draw a Scarecrow!
So many ways to engage in scarecrow fun… your child’s imagination is the limit to the possibilities … so that means they are endless. Remember if your child is struggling, do not do it for them… show them, explain to them, provide examples, provide encouragement, ask questions (how else could you) … they need to know that you believe they are capable!
Since I did not set up a theme for this week, I am going to take today to provide you with a few things you can do over the summer as a fun way to practice letter recognition and sounds.
Letter of the Day- pick a letter each day to focus on.
Have your child write the letters in chalk on the sidewalk.
Search for the letter in the story you read that night.
Make the letter out of rocks, sticks, or other natural objects.
Spring has finally sprung in my corner of the world, ok we have had lots of signs of spring, but the weather is finally cooperating. So this week we are going to focus on our own backyards. With the world still shut down to some degree, the backyard is a safe place to be.
In my backyard by Lori F.
In my backyard
I can be
Anything I want to be
I can ride in a spaceship
Up to the moon
I can set up a picnic
And eat mud pies with a spoon
I can roll in the grass
Or watch the clouds roll by
I can swing on my swing
And pretend I can fly
In my backyard
I can be
Anything I want to be
Take time today to let your child’s imagination run wild in the backyard. Have a picnic lunch. Lay down and look at the clouds, birds and see if you can find a plane.
Your backyard is an ecosystem. Can you find living and nonliving things? Can you find various types of plants and animals that make your backyard their home?
When you come back in, after you wash your hands, complete a writing assignment. You will notice that one sets your child up to write a narrative. The other sets your child up to write an expository text. Yes, children as young as 4/5 can write both, and enjoy it!
narrative writing activity…. What can you be in the backyard?
expository writing…. What do you see in your backyard ecosystem?
So, as I mentioned yesterday, I did not get around to posting my Sunday topic page which means you did not get some great stories and videos about this week’s topic… so here you go! The first is from SciShow Kids on the science of bubbles, the second is a song from Laurie Berkner Band, and the third a story. One more story to look up is The Bubble Factory, this is one of my favorite bubble stories!
Bubbles… kids love them, pets love them and lets admit it … adults love them. But, why teach about bubbles? First… because they are fun. Who doesn’t like to learn about things that are fun? And, for kids, this is exactly the motivation they need to learn… a love of a topic, and wanting to know the why behind it.
So, lets first talk about the why. Bubbles are a thin film of soapy water enclosing air. The bubble forms into the shape of a sphere because this shape uses the least amount of surface tension. When you break the surface tension, you pop the bubble!
Now go blow some bubbles. Don’t have a bubble wand? Make one! you can use pipe cleaners, straws or even just loops of string on a stick. Get creative. Try different shapes.
Children love change, well they love learning about change. This is why they enjoy open ended projects. They love to mix baking soda and vinegar to see the reaction, mixing various colors to see the change. They love to build things up and knock things down. All forms of change.
Teaching life cycles is another form of change, and the bigger the change… the more interested children are in the change. Teaching the life cycle of a butterfly is one way to do this, especially if you can get hold of some caterpillars that are almost ready for metamorphosis. Teaching the life cycle of a frog/toad is another one that children really enjoy.
Here are two stories that teach about this transformation. The top one is a fiction story and the bottom is an informational text. It is important to share both types of books with children. Many children enjoy informational texts because it provides information, so do not shy away from these books when choosing books to share with your child.
It is important for children to record their learning and demonstrate the knowledge they gained. In this case there are a few fun ways to record what they learned about the metamorphosis from egg to tadpole to froglet/toadlet to frog/toad. Here are a few to try!
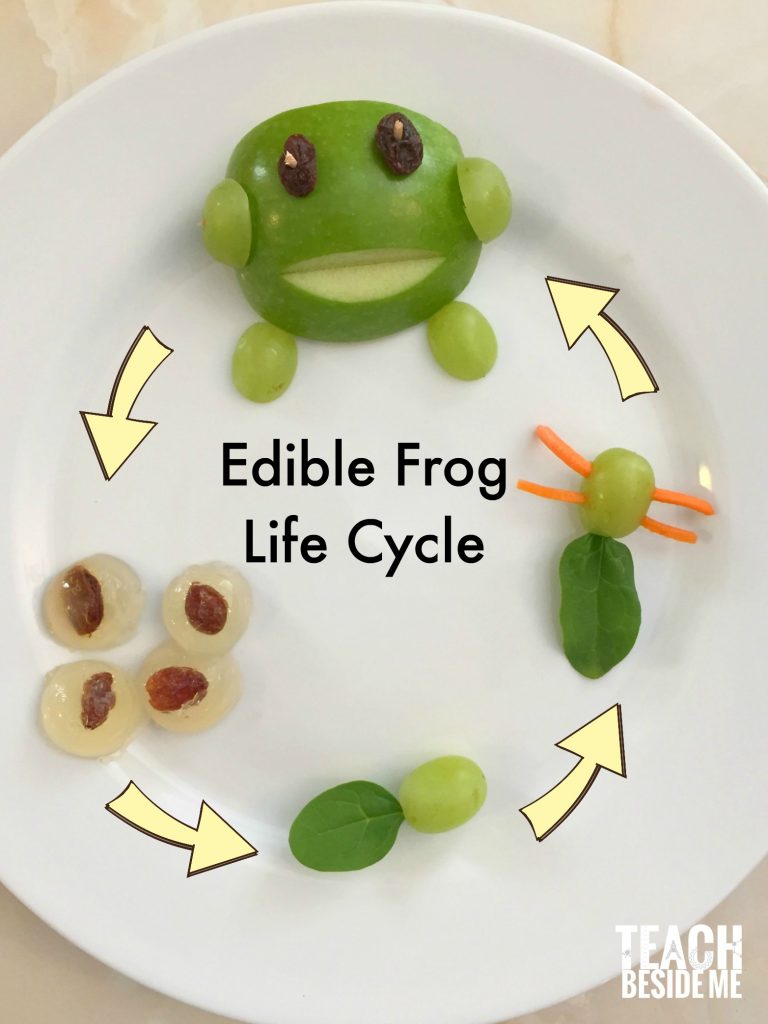
When I teach, I love to use food to help children in the learning process, who doesn’t love to learn with food… and this is all super healthy foods! Teach Beside Me’s has a blog post on the Edible Frog Life Cycle. This was in my lesson plans before school ended! We were going to have this as a snack and then the children would have recorded what they learned/ate.
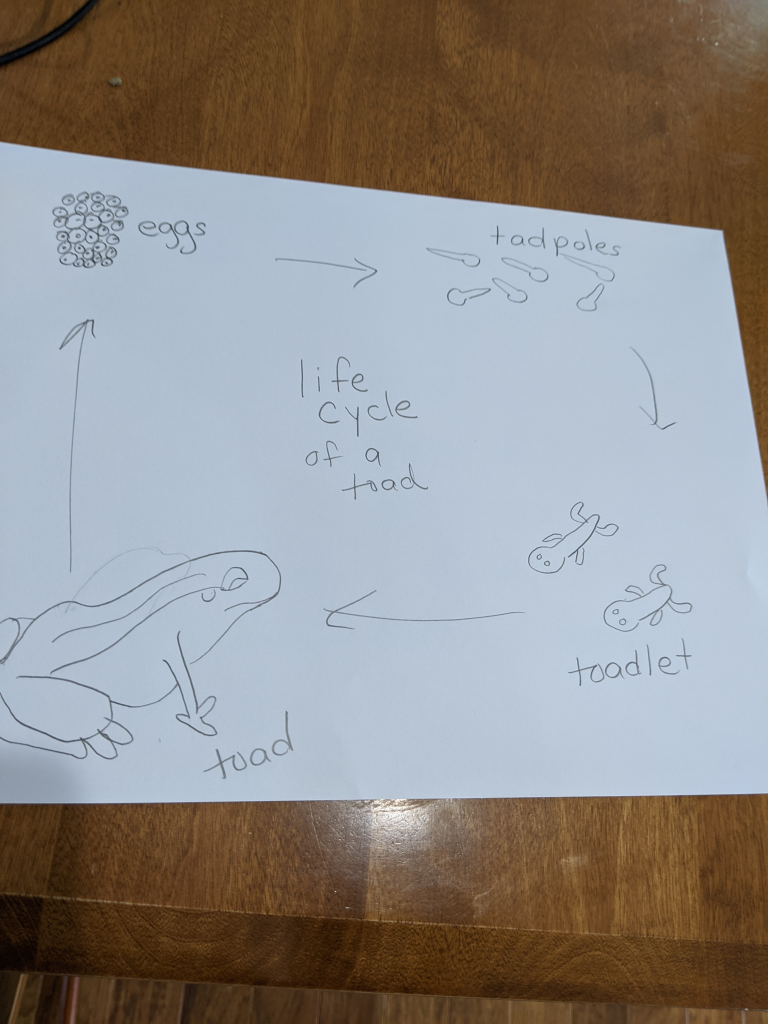
This recording can be completed a few ways. As I’ve mentioned in the past, we do a lot of paper creations in school. For this I would have given the children a paper plate, 2 shade of green paper and a small amount of white.
toad life cycle
But, as I have also mentioned in the past, I do not have construction paper here soooo yet again you will have to deal with my own illustrations. I think I have drawn and colored more pictures since March than in other whole school years! (Well at least illustrations that were not on the dry erase board and removed quickly). When illustrating make sure they see the connection between the phases and that it is circular.
Today’s post is going be a bit of a rambled mess, but bear with me I’m trying to give you a variety of things you can do at home with your kiddo.
As mentioned on Sunday, an ecosystem is all living and nonliving items in an environment. Their existence is symbiotic in that they help each other live, survive and thrive!
This is a two step process. You can choose to just do that art part, or just do the chart… or do both. They also do NOT have to be done in one sitting or on one day. (read all the way to the end for a fun gross motor pond challenge)
pond illustration
art–Have your child craft a pond scene. Here are some ways to do this….
In my class we often do paper collage work. I provide the paper for the background and any other large colors they’d need, such as for this I would provide a large sheet of white, a half sheet of blue and a quarter sheet of green to each child. Then I have a milk crate filled with scraps. They pull papers out to do any and all items they want to add into the picture.
But since I’m home and don’t actually have construction paper here, I drew a pond picture. Use whatever medium your child enjoys using while drawing
You could also have your child paint, print pictures on a computer or even learn to do some photoshop work, with your help.
Want to challenge your child, have him/her label the items in the picture. Remember the different levels of writing and that is should not/will not be spelled in book spelling. Even getting just the beginning sound is great at this age!
T-chart of living and non-living
Learning to create charts, lists and other ways to organize and group information helps children put their new information into a manageable configuration…. plus they will learn to do this when they get into elementary school. When we do this at school, it is typically done whole group with the teacher doing all the writing. Providing illustrations helps connect to the printed words to the meaning (they don’t care if you can’t draw… the worse the illustration the better sometimes).
Create a “T-chart” to collect information on the living and non-living items you can find at a pond. You will have to get creative for the non-living, but there are quite a few.
As I mentioned on Sunday, research and fact finding are a favorite for children who are preK age. This is why they ask so many questions. They want to know more and more and more. While I’m showing you how we do this using arachnids, you can choose to pick a different topic such as your child’s favorite animal, food, sport, form of transportation or any topic that fascinates your child.
When searching for videos on youtube, I typically put in the topic for kindergarten or for kids. Such as when I searched up the video today I searched arachnid facts for kids. Next look over the video. I look for facts, visual interest and sound quality. You get to see the same sources over time and know the quality of the videos.
Put the close captioning on. Yes, this sounds strange, but it is a great way to connect the printed word to what is being said. You may not realize how often your child will notice the close captioning and see words they know or begin to make that connection between a word used over and over in the video.
Watch the video all the way through. Now lets go back and review the new information. Here are a few ways to do that.
Can Are Have chart
Can, are, have (need) charts are a way to put the facts you know into quick sentence forms. Your child will provide knowledge about the topic in the form of Arachnids are spiders. Arachnids have 8 legs. Arachnids can hunt their prey
Topic Web
This is just a collection of thoughts. You web off the the main topic and then can expand from there.
Illustration facts
Have your child draw illustrations to show what you know. In this case they could draw a detailed picture of one type of arachnid and then be able to use that to show that they have 8 legs, 2 body parts, can paralyze their prey etc…
Conversation
One of the best ways for a child to show what he/she knows… is to talk about it. Have a conversation where you pull information and facts that they have seen in the video. Can they make connections between what they knew already and what they just learned? Do they have more questions?
This activity can be the jumping off point of more research. Do you want to learn more about the same topic? Did your child leave with new questions? Would they like to learn about a similar topic or something totally in a new direction. This is a great way to encourage the why questions your child already has and show him/her how they can learn more about these topics.