Today I’m going to start by linking you to FOUR direct drawings! Yep… 4! They are all different drawings of candy. As you can tell, I really like Arts for Kids Hub for direct drawings!
Today’s project… provide your child white, yellow and orange paper. Show your child the shape of candy corn. Encourage your child to draw and cut out a candy corn shape. Now tear or cut the white, yellow and orange paper to cover and create your own paper candy corn. (These pictures are from when my own sons were 3 and 4)
I hope everyone has a fun and safe Halloween… I will see you again on Monday when we start a new month and new theme… Animals get ready for winter!
Today let’s listen to the story/song: If You’re a Monster and You Know It by Rebecca and Ed Emberley. This is to the tune of If You’re Happy and You Know it, but with a twist.
The illustrations in this story are very bold and on black. This is a great opportunity to create some paper art. In school, I keep a crate of construction paper scraps and we use them all the time for these projects. At home, just keep the larger scraps from art projects in a bin or bag and put them out whenever you want your child to cut up paper to do an art project… reduce, reuse, recycle.
Encourage your child to add the elements in the story on their monster so they can then retell the story with their monster!
It’s Friday!! Did you have fun learning about pumpkins this week? You will have to let me know which activities you tried and which types you’d like to see more of in the weeks to come!
Today’s stories:
Pumpkin Jack by Will Hubbell– Tim carved the best pumpkin and named him Jack. He puts the pumpkin out into the garden as it begins to rot. Tim watches Jack change over time. Watch to see what becomes of Jack over the days, weeks and months.
Pumpkin Circle: The Story of a Garden by George Levenson — in this informational text you follow the life cycle from seed to seed of a pumpkin. Story written in flowing and bouncy verse to match beautiful and vivid photographs.
Here is a fun song to learn and sing together.
Little Jack O’Lantern (sung to the Battle Hymn of the Republic)
Little Jack O’Lantern had a candle lit inside
Little Jack O’Lantern had a candle lit inside
Little Jack O’Lantern had a candle lit inside
Till somebody blew it out. (then blow out the “candle”)
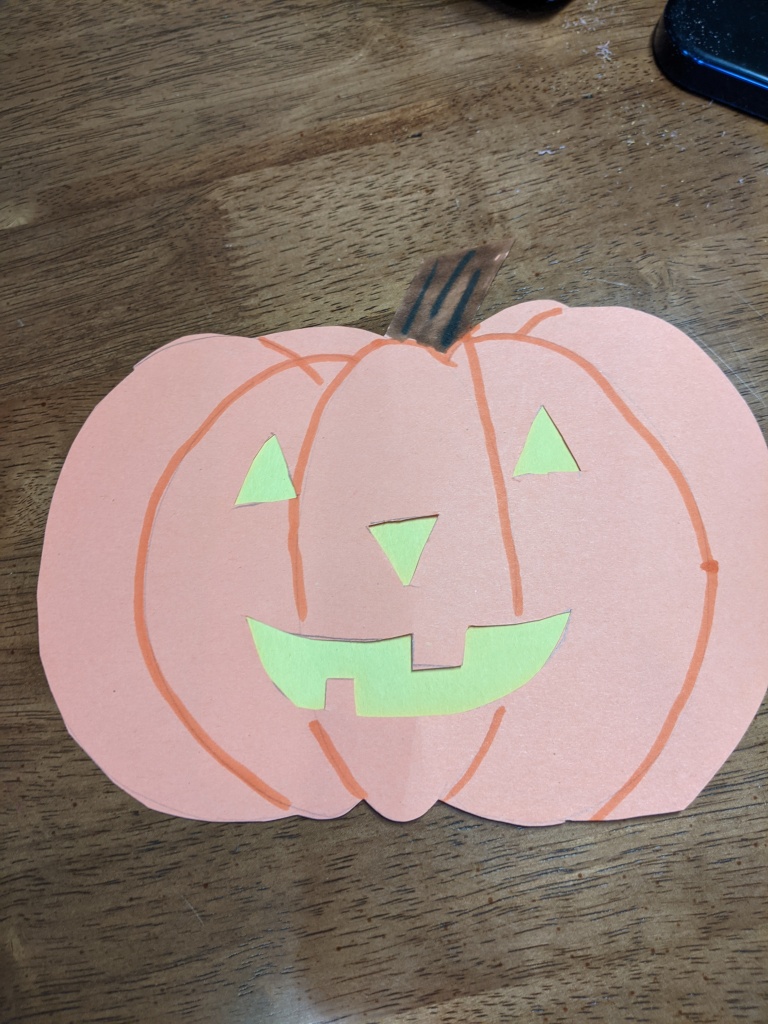
Now let’s make a Jack O’Lantern!
For this activity in school I would typically give the children the option of drawing and cutting out their own pumpkin shape or using a tracer. At home, you can either let them create their own or trace something to make the basic shape (plate, bowl, or other roundish item).
Determine if you want your pumpkin to be tall and skinny or short and plump.
Trace/draw the outline of your pumpkin onto an orange sheet of paper… or make it a green pumpkin, or a white pumpkin… you pick!
Does your pumpkin have a stem or is it a “stumpkin”?
now cut out the pumpkin… only cut the outside (trust me say this as some will cut ALL the lines they drew!)
Now design the face of your pumpkin.- you can either cut pieces out of yellow, white or black paper and glue it onto the pumpkin or cut the pieces out of the orange paper. I show the children how to bend the paper to start cutting into where you want the openings.
Use markers or crayons to add the pumpkin lines, color in the steam, and add more details
If you cut out the eyes, you can either leave them or back the pumpkin in yellow or black paper to see the depth.
If you have been following my blog for any length of time you know I love doing direct drawings with children. While I wholly see the value of open ended art projects and suggest them on a regular basis, there is much to be learned and gained by following along with direct drawings!
Art for Kid’s Hub has THREE different scarecrow drawings! Check them out here, here and here. While they are not the only direct drawing available on-line, I used their links with my classes often and even my pre-K kiddos could follow along with the drawing steps, with limited support! I love that he encourages the students to try and reminds them it is ok for all the final products to look different… it’s about having fun.
On top draw a flat rainbow line touching the tops of the smile line
from the ends, connect back to the smile line with slight curves
now draw the top of the hat, I like to open this up to let the children be creative. I point out where the line should start (where the smile and rainbow lines connect)
draw two parallel lines at the bottom of the smile line, making the neck
from the bottom of that, draw lines parallel with the bottom of the page all the way to the end of the page
below that draw two shorter parallel lines to make the arms
from the end of those lines, draw perpendicular lines going to the bottom of the page
Now for the fun!
Add eyes, nose, mouth (ears if wanted)
Add straw coming out from under the hat
Add a flower, patch or other embellishment to the hat
Don’t forget clothes!
When you are done drawing, go over all the lines in marker or crayon and create the coloring book lines… then color!
Today is fun Friday and we will wrap up our five senses activities. But, I do encourage you to come back to some of these activities from time to time and remember to always explore with your senses! Here is another great story to listen to My Five Senses by Aliki
Today we are going to take the idea of Mr. Potato Head and transform it into a different item. Colby and I did this with the popcorn box in my Facebook live last Friday. So… pick something you want to draw, a fruit, a vegetable, a toy… whatever and give it the five senses. Make sure you go back and review the senses and the body part that is associated with the sense.
Now if you want to get creative and let your kiddo have fun… let him/her add the five senses to an actual item, such as my apple man below! I bet they will love this activity. I used toothpicks, but you could easily use scotch tape. Have fun, get creative and enjoy the learning process!
no apples were injured in this activity but he did make a tasty snack after!
Let’s end the week with a fun and simple craft project. Read or watch a Pete the Cat story, and then get ready to make Pete.
Materials:
blue sheet of construction paper
scissors (child size Friskar scissors are the best, in my opinion, for children)
paper to mount your Pete
markers or crayons
glue/glue stick
any other paper to embellish Pete’s clothes
I will share with you two ways to have introduce this activity to your child
1– Provide templates of a rectangle (large and long/skinny), semi-circle, triangle. Explain to your child how to trace around the shapes so he/she can cut on the lines. Oops poor Pete is falling in my picture oh well!
2– Provide a picture of Pete the Cat and have your child draw Pete him/herself on the blue paper and then cut it out.
Both Pre-K and Kindergarten children are capable of both of these steps independently! Allowing and encouraging your child to work independently will build not only the skill, but also your child’s confidence. In school, we will help a child hold scissors correctly, demonstrate how to rotate paper while cutting and provide encouragement… that’s it. They can do it. It might not be perfect, but it will be their work!
As spring is finally, maybe, showing up and staying longer and longer, it is time to spend more time outside. Many of the activities I have shared can be moved outside and I will try to provide simple alterations to taking the learning outside.
Today’s fun Friday activity is made for being outside. You can do this in your backyard or while going on a social distance walk around your neighborhood. Scavenger hunts are a great way to encourage your child, and you, to look at the details you might overlook normally.
I created two suggestions for you, but you and your child can create his/her own criteria. I also used two different formats for collecting the information, but there are many other ways too.
The first one looks for colors. Where can you find each color. Have your child do a quick illustration of the item they found of each color. What colors are easy to find and which are more challenging? Can you find only living or nonliving things to represent each color?
The second I created a specific item search. How many of each item can you find? I drew ten frames to collect the amount, but you could also teach your child to tally count, or even create a graph to collect the quantity. Have your child think of his/her own list of items they think will be seen on the walk. If you are going into the woods or by a pond, then switch it up to match the items you would see specific to that ecosystem.
Create the form before you leave the house. Then provide your child with a clipboard, pen (if you attach it with a string it won’t get lost and they will think it is the coolest), and head out. Talk about what you see. Conversation is a key tool in learning. This chat you have with your child is a critical. It provides engagement. It allows for higher level thinking. Remember to talk to your child with “big” words, use science terms… they love it and soak it up!
This week my son choose to do a painting project for one of his art assignments. They suggested using coffee, juice or other colored juices. He had originally suggested coloring water with food coloring, while this would work, food coloring is MESSY!
attempt one, dipping the markers
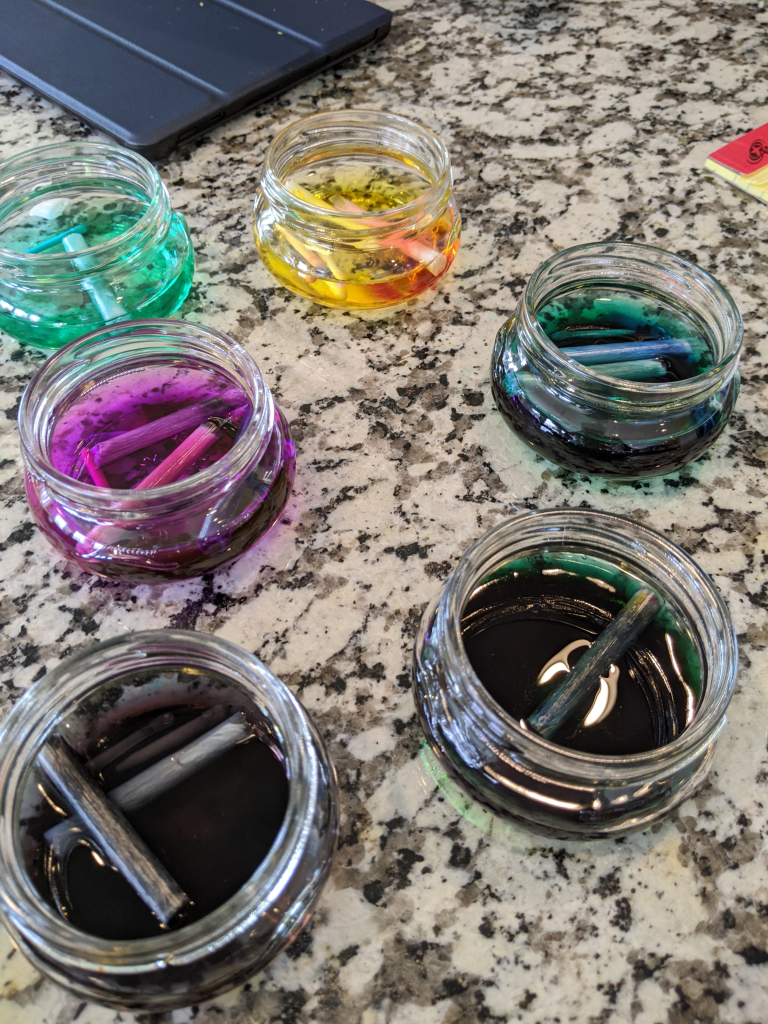
So, we decided to try out something I had seen online around Earth Day. Taking dried or older markers and using them to make water color paint.
We grabbed a selection of markers from an older art kit.
foam fillers left over night
We first put the markers tip down into small glasses with water. We saw very little change and my son decided to try taking the markers apart and just putting the tips and sponge into the container.
We then left them overnight to let them soak and blend the colors.
My son and I decided to use q-tips in lieu of paintbrushes. First my son decided to paint an abstract creation. I first drew an line drawing of duck that I outlined in sharpie marker. My son enjoyed testing out the colors and seeing how they worked blending together and more. My first attempt was a flop as the sharpie bled into the paint colors.
abstract painting
I then put a clean sheet of paper over my line drawing and could follow the lines to paint my duck which I then outlined after it was dry. My son decided to paint a jellyfish. He used the purple because this was the richest color.
duck in progress
jelly fish
So, here is what we learned….
this process does work. The more markers in a color the stronger the paint color. We probably should have used less water, but it was an experiment. I feel this would be a great project to do in school as it is a good way to use up all those dried up markers that are created when the children forget to cap the markers!
I was trying to decide what to do with my kiddos in zoom this week. I wanted to do something on spiders since they were learning about arachnids this week. I had already told them we were going to do a direct drawing.
I came across two options. Here is the one I am not doing on zoom, so those who watch on zoom have another fun spider direct drawing project.
Materials: paper, pencil, black marker, things to color with
cross lines
Hold the paper vertically (tall and skinny)
Draw a line down the middle of the paper (this divides the paper in half making 2 rectangles)
Draw a line across the middle of the paper forming a “t” (this divides the paper in quarters making 4 squares)
From the middle of the page, draw lines out to the corners, this is a tough skill, but even if the lines aren’t straight it will work. (this divides each quarter in half making two triangles each. when done your paper is now in 8ths and 8 triangles)
Now the fun… ummm tough… no fun part.
completed pencil web
Pick one section. Draw smile lines connecting the two sides of the section together. I did about 4/5 smiles in each section. As you go around, try to connect the smiles in one section to the one in the next section. — again if this doesn’t work exactly it is fine!
After you complete drawing the web with a pencil, I then have my students go over all lines with a marker. This provides the “coloring book lines” and makes the coloring pop as well as makes it easier for them to see the illustration.
Next, we color! I think I have colored more in this quarantine then I have in years past. One the right side of this web I colored in a randomly. This looks really cool, but the teacher in me then switched to doing patterns on the left side! You can do either, both or something else in your imagination. I used crayons because I have those at home. Water color paints would be really cool for this project.
if you want to see the project I am doing with my students on zoom… check out my Instagram account (@mydayinpre_k)… I posted it there.
In searching for ways to show colors, color mixing and color separation, I came across a fun video from The Dad Lab… I am doing this with my class today on zoom. It is cool and your kiddos will love not only playing with this concept, but sharing it with others.
But, before we get to this step in the process, we are going to review color mixing AND color separation. Color mixing is easy to see with the mixing of different color liquids. Since I don’t have paint a home, we will just use colored water.
After, we will have some fun. Have your child cut strips of napkins or paper towels into long strips. Then color onto the strip with washable markers. Make sure to leave the bottom 2″ or so blank.
Now dip that into a container of water, but do not dip the part you drew on, this will muddy the water AND cause a faster reaction. It will still work, as you can see my son dipped his in the wrong way… when you see the finished products you will see the difference.
After dipping into the water, leave it sitting on the edge of the bowl and watch the water wick up the paper towel. As it does this many marker colors will separate into their primary color combinations. Now this is not perfect science and most of the given pigmentation will remain, but you can begin to see the color separate and combine with the other colors you used.