teaching thoughts · writing

Phonetic Spelling

Have you ever seen your child write on their own? Children will write in play without support all the time, but as soon as you sit them down to write something they expect you to write it for them and/or tell them how to spell it. Why? The reason is the adults.

When children write on their own they go through a natural progression from scribble writing and random letters all the way to correct spelling. But, if adults tell children how to spell and/or that they are spelling words wrong then the child is afraid, cautious and concerned about doing it right. So, what can we do?

Teachers have learned that you can guide children through these writing stages without hampering their development. Wait what does that mean? Phonetic spelling, as known as inventive spelling or transitional spelling, is the process of writing words based on the phonetic sounds you hear in the word.

When children begin the process of phonetic spelling, they start by writing only the beginning sound. This is because it the the key sound you hear in a word. The next step is to add on the ending sound and later when they have mastered an understanding of more letter sounds and especially vowel sounds they will add in the medial sounds. For example, let’s pretend your child drew a picture of a house. When they begin the process of writing they may label the picture just with an “h”. As they gain more confidence in their own writing process they will naturally begin to add more sounds. Now they will write “hs” as house. Moving forward they may learn that “ow” says /ow/ and will write “hows”.

While none of these are the correct spelling they are steps towards getting the correct spelling. One concern that adults often bring up is that the child is learning it wrong. Let me dispel this myth, your child is not learning to spell the word, (s)he is learning the process of putting their thought on paper. At this point in the learning development, we are working on the concept of print has meaning and that you can put your thoughts down in words. Later as children learn more phonics skills and begin to see that words are spelled a specific way, they will master the correct spelling of words.

When teachers assist children in progressing through this process, the key is to sound out words slowly and teach children to stretch out words. We have them visualize the words on an elastic band. Pull the band slowly to stretch out the sounds. Write the sounds you hear. The key is to always go back to the whole word before you are finished. Here is another example: candle. Have your child stretch out the word c-an-d-l. When your child starts writing they will probably write “c” or “k”… either works. Then they may add in the “d” as this is a more dominant sound than the “l”. They will then progress to cndl as these are the consonant sounds you hear in the word candle. This is praised as they have progressed. If your child has learned “an” you can stretch it out and say do you hear the “an” sound in the word?

So why? Why do we want children to do through this progression? Well… a few reasons. One, they are writing. They are putting their own thoughts on paper. They are doing it their way and aren’t being told no that’s wrong. They aren’t ready to do it independently and in book spelling and won’t be for a few years. We want children to view themselves as writers and the earlier they write, the stronger this image will be.

Why else? When children make this natural progression of writing they actually develop stronger phonics and phonemic awareness skills. They need to use these skills to write on their own. They are not waiting to memorize and learn a new word or rule before they can write. If children had to memorize all the words they wanted to write before they began writing they would not get beyond sight words and simple cvc words until late in first grade. With transitional writing they can begin writing words as soon as they master their letter sounds.

So… what does this mean for parents. First if your child writes something that you can’t read it is OK! Ask your child to read it to you. “I see you labeled your picture, will you read the words to me?” “I noticed you wrote sentences to go with your illustration, I’d love to hear what you wrote.”

Next, if your child gets stuck on a word help them sound it out. It’s ok if it is not spelling exactly. In the classroom, I always talk about kid spelling (or kindergarten/preK spelling) verses book spelling. I do not expect the children to write in book spelling, but this addresses the fact that there is a correct way to write something, but since they are in K, preK are kids whatever, it’s ok to write it their own way.

Finally, if you are working with your child to sound out a word and they spell it correctly… tell them. Look you wrote that in book spelling. This will begin to solidify the correct spelling and that they can transition from phonetic spelling to book spelling. Just remember to praise their effort to use phonetic spelling too or else they will revert to depending on you for all the book spelling!

STEAM · story · topic

Weather

March is a great month to learn about weather. It is one of those months that you see ALL kinds of weather: sunny, cloudy, snowy, rainy, windy… hot, warm, cold and really really cold!

Today let’s listen to a story about the different types of weather. National Geographic Kids Weather by Kristin Baird Rattini. Want to learn more? Watch What is Weather by AnuClub.

Today let’s make a drawing! I folded a paper into thirds and then folded that in half creating 6 columns on my page. I am going to draw one picture that shows 6 types of weather! You could always do that same concept with 3 or 4 types to make it simpler.

Learning about the weather and the effects of weather are learning standards in both kindergarten and preK. We learn about how to dress for weather, what patterns can we see in weather, how plants and animals are effected by weather and more. The biggest piece is talking about how it effects everyday life.

story · teaching thoughts

After the Fall

Yesterday I couldn’t decide what to write about, so I didn’t. I didn’t type anything yesterday. Some days life just gets to you more than you realize. I find that the more life is calm, the more I’m excited to sit down and blog. This morning I was reading some of the blogs that I follow and A Teacher’s Reflection, a blog written by a preschool teachers, mentioned the story After the Fall by Dan Santat.

I decided that this story is so important to hear right now. While the story is about Humpy Dumpty and how he copes after his fall, and about moving forward after and accident, we need to think about this in terms of the pandemic. What do we need to do to feel comfortable moving forward? How is your child coping and adapting to the changes that took place with the onset of Covid? How are they dealing with the change over time?

First thing you need to look at is how are YOU the adult dealing with these changes? The way you the adult are adapting and moving forward plays a huge impact on how your child deals with this. Are you talking about how unhappy you are with changes? Are you being positive about the world you are living in? Are you talking to your child about his/her feelings and listening to what they are saying?

As we get closer to having more and more people vaccinated, we need to see that there maybe some hesitation and concern still in children. You can’t see who is vaccinated. You can’t see who is safe. Children struggle to understand when big changes happen and when life begins to open back up again, we may see this struggle again.

How can we as adults help? Talk. Often times adults feel they need to shelter children from change and things that going on in life. We need to talk to children about what is going on. We need to express our concerns and listen to their concerns. We need to keep them in the loop. Using stories is a great way to start this conversation, this is why I shared this story with you today!

high frequency words · teaching thoughts · topic

Sight Word Work

Ok… today’s post will be a bit of a tangent for me. Typically I pick a story and then provide an activity or two to work on related to the story. But, over the weekend a friend asked me for help, so I’m going to share some of this advice with the rest of you.

Many primary teachers (K, 1, and 2… and sadly often even some preK teachers) expect children to master sight words. While I will not get into my opinion on this, I will provide you with an explanation of sight words AND some fun ways to practice.

Sight words, are words that your child read by sight, they master and never need to decode again. The reason mastering sight words is important is for reading fluency. When children have a mastery of sight words (a, the, in, it, is, look etc… ), then when they encounter these words in reading they just know the word and can move forward in reading harder words that (s)he may need to decode. Different schools use different sight word, or high frequency word, lists. Often times they are set by the reading program that the school uses.

Parents often ask, should my child learn to just read these words or do they need to know how to spell them too? While most teachers assess sight words by showing flash cards and having children read them, they often also assume that your child will also be able to use them in writing. My belief is that you should help your child learn to write the word. If you can write it, typically can read it. Just because I can read something does not mean I can spell it on my own.

Activities to help learn sight words:

  • write the words!: pencils, crayons, markers, chalk, paint, water, any medium you can
  • build the words: magnetic letters, play dough, letter blocks, other letter toys
  • play games with the words: bingo, matching
  • Candyland sight words: assign a sight word for each of the colors on the board, have your child draw a card and then read or write the word that matches the color before moving along the path
  • Bang- create flashcards with the sight words include in the stack 2 or 3 “bang” cards. When your child(ren) go through the stack, have him/her read the card they draw. If they get it correct, they keep the card, if they get it wrong it goes back in the pile. If they draw a bang card, they put all of their cards back. The person with the most cards at the end wins
  • Flashlight find- put the words on post-it notes and hang them around the room. turn the lights off and use a flashlight to find the words. Have your child spell and say the word or use it in a sentence.
  • Magazine hunt: provide your child with magazine and have him/her search through the pages to find the sight words. Cut the words out and make sentences on flashcards. Then use these sentences to review the sight words
  • Highlighter reading: Copy a page or two from a favorite story. Provide a highlighter and have your child find the sight words in the text. Show him/her how to use the highlighter to highlight the sight words.
  • Cloze sentences: write sentences with a sight words missing. Have your child read the sentence and determine what sight word belongs. _____ dog ran fast. Simon likes ____ play _____ Lego blocks.
  • Sight word Twister, Hopscotch, Mazes: create “game boards” with chalk, tape or items. Use the sight words on the spaces or as part of the movement in these games.

Here is the key… MAKE IT FUN! While flashcards are simple and yes they work… they aren’t fun and do not make a lot of connections. Children need to see the word in text to make the connection to the reading AND they need to do something with the word to make additional connections. The more you do with the words, the stronger the connections will be.. the faster they will not only learn the word for the assessment, but also master it for ownership in reading.

teaching thoughts

Brain Breaks

Ok… What are brain breaks and why are they so popular in school? A brain break is an opportunity for teachers and students to change gears. During the school day, children and adults are often hyper focused on the learning at hand. But, we know that this isn’t the best way to learn. You need to stop and change gears for your brain to process the information at hand. So, that is when you need a brain break. Teachers in the younger grades often use music and movement as a brain break. This gives your child the opportunity to move and change gears! We recognize the movement is a critical piece in learning. While many primary teachers (and some secondary teachers) allow and often encourage and provide opportunities for movement during learning it isn’t always possible. We need to get up out of those chairs and move around.

The addition of music also triggers additional parts of the brain to work. There are many wants to take these brain breaks and make them educational and fun! Many children’s musicians are seeing the need for this and creating learning based songs with movements. This connection helps our auditory and kinesthetic learners create additional learning connections through music and movement.

There are other ways to use brain breaks such as yoga, breathing exercises, classroom games and more. The key to a good brain break is change! A change from whatever you are doing at the time. So if you have been super active and need a brain break, then use breathing exercises to slowwwww down. If you have been sitting too long, get up and jump around.

Some brain breaks:

  • Go Noodle, Jack Hartmann, Dr Jean, Laurie Berkner Band, Raffi, Ella Jenkins for songs
  • head shoulders knees and toes– switch up body parts, change pacing of the movements, make it fun
  • freeze dance– put on music and then everyone freezes when the music stops
  • high knees/marching
  • show me how you: walk like a penguin, gallop like a horse, float like a snowflake etc.
  • blow bubbles
  • simon says
  • coloring
  • breathing exercises – Go Noodle, The Mental Heath Teacher
  • build with blocks
  • play with play dough
  • and so much more!

The key to brain breaks is to use them BEFORE your brain is ready to shut down. These should last 1-3 minutes (longer with younger children). Remember it is an opportunity change gears and refocus!

family activity · story · teaching thoughts

What is Given From the Heart

I was looking for something different to share. There are so many Valentine books out there for you to share with your kiddos, but I wanted something with more meaning. Something with more depth of love. I stumbled across What is Given From the Heart by Patricia C. McKissack. This is a touching story about compassion, resilience, gratitude and community. James Otis and his Mama have had a rough couple of months. Mama tell James Otis that “Misery loves company” but, as long as they have their health and strength, they are blessed. One Sunday in February they go to church the the Revered tells about the community creating Love Boxes for those in the community who are less fortunate. He tells them about a mother and daughter who lost everything in a fire. Mama says that she and James Otis need to give something to this family. James Otis struggles to find something worth giving, but plays over and over in his head the words he heard “what is given from the heart, reaches the heart”

Ok.. that was a longer recap than I normally give, but this story is very touching and a worthwhile read. We are living in a pandemic. There are so many families who are struggling to get by. There are so many who need a little more. Children love to help people. They do not always understand the struggle of others, but they know that people need help. What can you do to help your child see how (s)he can give from the heart. Look around your community. Is there a food bank you can contribute to? Is there a retirement community that is on lockdown that your child can mail pictures or stories? Is there a children’s hospital that your child can pick out stuffed animals to donate to or draw pictures? Write thank you cards and bake cookies to bring to the police, fire, hospital.

We all need to remember that we are a community. That we need to work together to help our neighbors. That when we give from the heart, we reach the heart!

art · STEAM · teaching thoughts · topic

Playdough

Did you ever wonder why teachers in the early years allow, encourage children to play with playdough? Often times parents see playdough as messy. It sticks to things, it gets on the rug and won’t come off. It gets under your nails and often times it smells strange. So why oh why do teachers want my child to play with it?

I’ll tell you why… it’s good for your child. Click here to read NAEYC’s (National Association for the Education of Young Children) article Playdough Power.

Benefits of playdough:

  • fine motor development
  • independent play
  • creativity
  • vocabulary
  • peer interactions
  • sensory play
  • dramatic (imaginative) play
  • science (cause and effect, textures etc)
  • math (size, thickness, number etc)

Ways to encourage and extend playdough play:

  • add tools (plastic knife, dowel for a rolling pin, cookie cutters)
  • read a story before playdough play to encourage play based on story topic
  • add toys (cars, construction vehicles, dolls/plastic toys)
  • provide kid size kitchen tools (pans, fork, knife etc)
  • natural products (rocks, sticks, leaves)
  • provide items to make textures (combs, strainers, buttons etc)

Ways to save your sanity

  • teach your child to clean up the playdough! use the playdough ball to pick up the smaller pieces
  • provide a mat, table cloth or cookie sheet for the playdough to be played on to contain the “mess”
  • provide bins for playdough toys to be collect into at the end of play
  • have your child think of the items to put into the playdough

Make your own playdough and you control the smell!

Basic no cook playdough recipe

  • 2 cups of flour
  • 2 Tbps of oil (cooking, baby oil, coconut oil etc)
  • 1/2 cup of salt
  • 2 Tbsp cream of tartar
  • 1- 1.5 cups of boiling water
  • color
  • scent (optional)
  1. Combine flour, salt and cream of tartar in a bowl
  2. add in oil
  3. Put color and/or scent into 1 cup of boiling water
  4. stir to bring together into a sticky ball. if it is too dry and won’t combine add up to 1/2 additional cup of boiling water, but add it slowly or you will put in too much
  5. when it is a sticky ball, let it cool for a bit
  6. roll it out onto the counter and then kneed the dough for a few minutes until the stickiness is gone. This is an important part in pulling the dough together. after a few minutes if it is still really sticky, add more flour
  7. store in an air tight container when not in use and it should last about a month

Colors and scents:

  • kool aid packets is a great way to add both color and scent to dough 2 packets added to the dry ingredients should give the color and smell you are looking for
  • food coloring (gels add more color than liquid)
  • extracts- vanilla, mint, orange, lemon
  • spices- cinnamon, apple pie spice, pumpkin pie spice

teaching thoughts

Graphic Organizers

Why do teachers use graphic organizers with young children? Wait, first let’s talk about… what is a graphic organizer?

A graphic organizer is a tool used to collect information in an organized and visual fashion. This learning tool is great for visual learners. It helps children put their thoughts and learning down on paper in an organized visual manner.

Typically in the primary grades you will see teachers use circle maps, bubble maps, double bubble maps, venn diagrams, KWL (know, want to learn, learn) and other organizers on a regular basis. We also use Can, Are, Have/Need charts; beginning, middle, end; main idea, supporting details; and tree charts.

Teachers uses these maps whole group in the primary grades to introduce the concept of collecting information and then using that collected information to write about a given topic. These are also great tools going forward for visual learners to help them study and master new topics.

It is a very visual tool that helps children learn to collect important information, compare and contrast topics, and move between known information and new information.

game · math · STEAM · story · teaching thoughts

Math and Penguins

Today we will listen to the story Penguins Love Colors by Sarah Aspinall. In this story 6 penguins, named after 6 different color plants, work together to paint a colorful picture for their mom.

Today, let’s do some math! I am going to show you a few different adaptations of this activity. Your child will need, 2 dice, a sheet of paper, a pencil, counters (goldfish crackers would work perfect and go with the penguin theme).

On the sheet of paper draw out two ten frames on the top half of the sheet and on the bottom, create three columns.

Now have your child roll the dice. They will use the counters to show the total in the ten frame at the top. If your child struggles to see how to do this, using two different color dice AND counters that match the dice colors often helps to see this process. Remember that they are NOT putting the amount of one dice in the top ten frame and the amount of the second in the bottom. The goal is to see the addition of the two numbers together. In my picture I rolled a 5 and a 6. So I have the top ten frame filled in completely and the bottom only has 1.

Next your child will record the number sentence into the columns at the bottom. Was the total less than 6, exactly 6 or more than 6? You do not need to work on saying 4 plus 1 equals 5. You could have your child state 4 and 1 more makes 5. This way of stating the fact actually matches math thinking more and will help with the understanding of addition.

Ok… so my kid just doesn’t get it… now what? First, you might need to do the steps of this activity with them a few (like 3 or 4) times before they even begin to see the steps. You can break this down and do just the top, or just the bottom. OR, you can start with on die and do the whole thing but change the bottom to less than 3, exactly 3 and more than 3.

Now… let me tell you this is a LOTTTT of math thinking. Your child needs to recognize the number on the dice. They need to transfer this information into filling in the ten frame… oh and do it with two different numbers. Now they need to count and determine the new number made. Ok… THEN they need to figure out if this new number is less than, greater than or the same as the number 6. Oh and don’t forget you then need to record the result. Just a few steps. Just a bit of math thinking and learning.

This is a simple activity that can be adapted easily and played often. The more you play games such as this, the more your child will understand the concept of putting numbers together AND comparing numbers. You can also use dominoes, playing cards or number cards you make on index cards or sheets of paper.

STEAM · story · teaching thoughts · topic

Penguin Flying?

Today, let’s read a fantasy story about a penguin who wanted to fly. The Penguin Who Wanted to Fly by Catherine Vase. Flip-Flop wants to fly like, but he can’t fly. So, he decide to get creative and try to find other ways to fly.

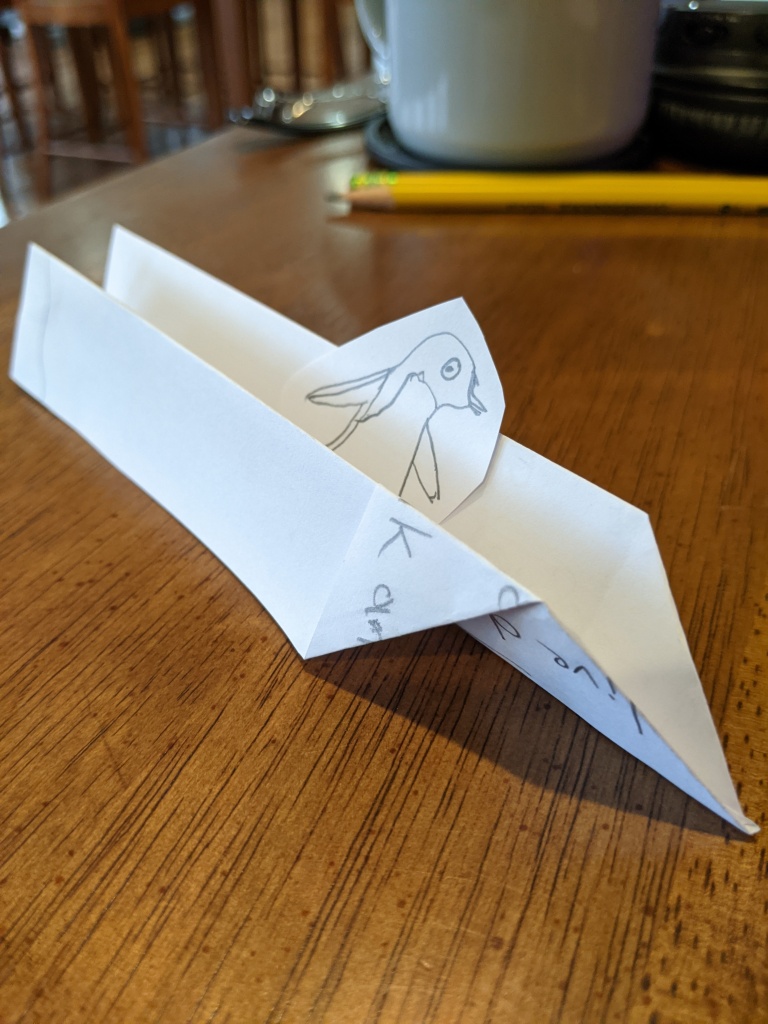
Create a paper version of Flip-Flop and then problem solve ways that you can help Flip-Flop fly! This is a great challenge project for your child. You can either provide materials such as paper, string, a small paper cup, tape. Challenge your child to find ways to help Flip-Flop fly. They could make a paper airplane, a zip-line, a “hot air balloon”. Maybe they want to put him into a toy plane, build something out of Lego or even make him a parachute. The point is to let your child’s creativity drive the result on how (s)he can help Flip-Flop fly. Also remember that failure is part of the process. In the story, Flip-Flop did not give up when his ideas were a flop, he just came up with another thought and then another. We need encourage children to try again. Look at things a different way, and not give up.

While searching for the story above, I found a different version of this idea. The Penguin Who Wanted to Fly by Rob Spicier This one is made of photographs put together to match the text written by the narrator. Umiak is a penguin who wants to fly like the puffins. He talks to other animals who live near him to find the answer to why he can’t fly. His mother helps him see that penguins do fly, just differently than other birds.

Why did both stories say that penguins can fly in the water? Is this really flying? Why do you think they compared the way that penguins move in the water to flying?

Another activity that these two stories work well with is comparisons. Create a Venn Diagram or Double Bubble Map to compare and contrast the two stories. How are they the same? How are they different?

Venn Diagram Maker | Lucidchart
Science- Double Bubble Map Instructions by Grant Ed | TpT